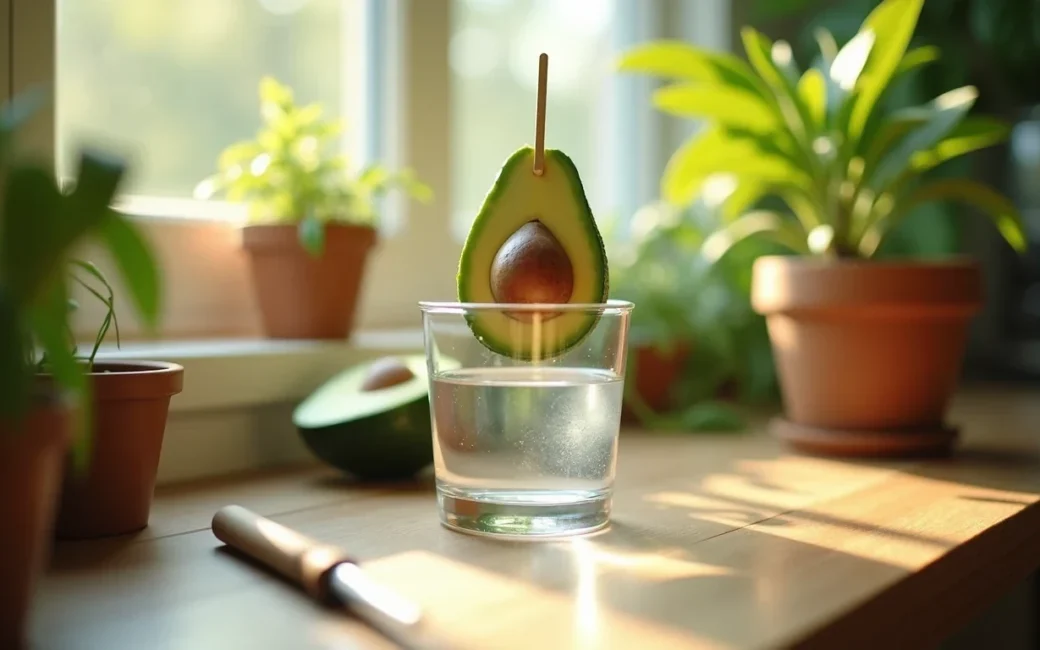
Every winter, kitchen windowsills across the country fill with avocado seeds suspended in glasses of water, toothpicks holding them like miniature satellites waiting to transmit. The impulse is sound: the pit from your breakfast is a viable seed, and given the right conditions it will crack, root, and eventually become a tree. Most growers do not realise until year six or seven that the fruit, if it ever arrives, rarely justifies the wait. Seed-grown avocados are a genetic lottery, and the odds of replicating that creamy Hass from Woolworths are vanishingly small. Still, the process itself teaches patience and plant care, and the resulting tree makes an attractive indoor specimen or garden shade provider. Here is how to do it properly, and what to expect when the long timeline finally unfolds.
Getting the Seed to Crack
Start with a fresh pit from a ripe avocado. Rinse off any flesh clinging to the brown skin, taking care not to damage the seed coat. Insert three or four toothpicks around the middle at a slight upward angle so the pointed end faces upward and the broader base sits lower. Rest the toothpicks on the rim of a glass or jar, submerging the bottom third to half of the seed in room-temperature water.
Temperature governs everything. Keep the water between 20 and 27 degrees Celsius, with 25 degrees proving ideal. A warm windowsill away from cold draughts works well in most homes. Change the water every three to five days to prevent bacterial stagnation. Bright, indirect light encourages the seed to split, but harsh direct sun through glass can cook it.
Roots typically emerge within two to six weeks, though some stubborn seeds stretch to eight or twelve weeks before showing any white growth. Success announces itself through visible cracks at both top and bottom, followed by the pale taproot pushing downward. A shoot appears only after root establishment, so resist the temptation to discard apparently dormant seeds too early.
One legitimate shortcut exists. Peeling away the thin brown seed skin before starting water germination can shave one to two weeks off the timeline. Beyond this, save your money. Rooting hormone containing IBA, gibberellic acid preparations, commercial seed-starter formulations, and kelp or seaweed extracts all lack solid evidence for accelerating initial avocado germination. Kelp may encourage somewhat stronger root development once roots have already appeared, but it will not make the seed crack any faster.
Moving to Soil
Timing the transplant matters. Wait until the taproot reaches seven to ten centimetres in length and the stem has pushed upward with a few small leaves, or until the stem itself hits fifteen to twenty centimetres tall. Choose a pot roughly twenty to twenty-five centimetres across with generous drainage holes. Avocados drown in wet feet, so the mix must drain freely. Standard potting soil amended with compost and either coarse sand or perlite suits heavy mixes; the goal is a loose structure that water passes through rather than pools in.
Plant with the root and bottom half of the seed buried, leaving the top half exposed above the soil line. The taproot is fragile and unforgiving. Bend it, break it, or let it dry out during handling and the seedling may never recover. Work quickly and gently, setting the root straight downward without cramming or curling.
Water thoroughly once after planting, then maintain lightly moist conditions rather than saturation. Position the seedling in bright light but shield it from harsh midday sun for the first week or two while it adjusts to soil life. Hold off on fertiliser for a few weeks; the seed contains sufficient stored energy for initial growth. Once the plant has settled, a mild feeding suits the developing root system. If the stem stretches leggy between nodes, pinch out the growing tip once six to eight leaves have formed. This forces lateral branching and produces a bushier, more stable young tree.
Long-Term Care and Realistic Conditions
Avocados demand specific soil conditions and punish inattention to drainage. In ground or in final large containers, use well-draining loamy or sandy loam at least sixty centimetres deep, with pH between 5.5 and 6.5. Heavy clay soils common in parts of Gauteng and KwaZulu-Natal require planting on raised mounds to prevent the root rot that follows waterlogging. Water deeply once or twice weekly during hot weather, cutting back in winter when growth slows. Always apply at the drip line rather than against the trunk, encouraging roots to spread outward.
Light needs shift with age. Seedlings want bright conditions with midday shade protection. Established trees thrive in full sun but benefit from wind shelter, as brittle branches snap easily. Frost kills young trees outright; even mature Hass cultivars tolerate only the lightest frost. Plan protection strategies for Highveld winters or delay outdoor planting until all frost danger has passed.
Feed with balanced fertiliser every six to eight weeks through the growing season. Avocados are notably salt-sensitive, so avoid heavy applications and salty formulations. Yellowing foliage often signals zinc or iron deficiency, correctable with trace element supplements. Maintain five to ten centimetres of coarse organic mulch, kept a hand’s width clear of the trunk to prevent collar rot.
Keep the tree in pots for its first year, moving up container size as roots fill each one. Plant out only when the tree reaches fifty centimetres to one metre tall, positioning it four to five metres clear of buildings and underground pipes to accommodate mature spread. Early tip-pinching establishes bushy architecture; follow with light maintenance pruning as the canopy develops.
The Fruiting Reality
Optimism meets genetics here. Seed-grown avocado trees typically require five to thirteen years before producing any fruit at all. When they finally do, the result is unpredictable in size, oil content, texture, and flavour. That seed came from a Hass, but Hass is a cultivar propagated through grafting because seeds do not breed true. Your tree carries a unique genetic shuffle, and most combinations produce fruit ranging from mediocre to outright unpleasant.
Commercial Hass production relies on grafted trees for good reason. Grafting joins scion wood from a proven cultivar onto selected rootstock, delivering genetic identity to the parent tree. The resulting plant fruits within two to four years, produces consistent quality, and allows growers to match A-type and B-type flower cultivars for reliable cross-pollination. Seed-grown trees offer none of these advantages.
Should your tree eventually flower, expect annual fruiting with a six to eighteen month gap between bloom and harvest. Only a small fraction of flowers set fruit, which is normal. Apparent second crops usually reflect mixed cultivars in the neighbourhood with staggered seasons, late-hanging Hass fruit picked across an extended window, or occasional off-season blooms triggered by stress or unusual weather. These stress blooms rarely set viable fruit and can contribute to alternate bearing patterns that reduce overall productivity.
Improve whatever yield potential exists by ensuring consistent moisture during flowering and fruit set, protecting blossoms from heat spikes and frost, and maintaining proper nutrition and pruning. Planting both A-type and B-type flowering cultivars nearby helps pollination, though this is far more practical and effective with known grafted varieties than with genetically random seedling trees.
When to Choose This Path
Growing an avocado from seed makes sense for specific purposes. The tree itself is attractive, with large glossy leaves and a tropical presence that suits patios and indoor spaces. The process teaches germination technique and long-term plant care across a substantial timeline. For anyone wanting reliable avocado production, however, grafted trees from reputable nurseries are the only rational choice. They cost more initially but deliver fruit years sooner with known quality.
If you do start that windowsill seed, do it with open eyes. The pit will grow. The tree may thrive. The fruit, when and if it arrives, will almost certainly disappoint. Treat the project as horticultural education or ornamental gardening, not as a path to free avocados. The kitchen windowsill experiment is worth running once. Just do not plan your brunch menu around the results.